
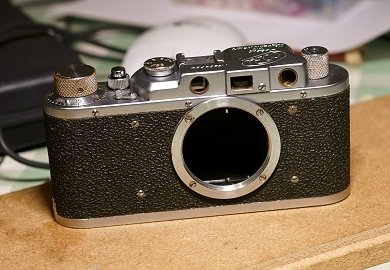
November-December 2019: FED 1

 Here's a new challenge: in this FED 1, the curtains are threaded around the vertical bars, I must do the same to keep it's authenticity.
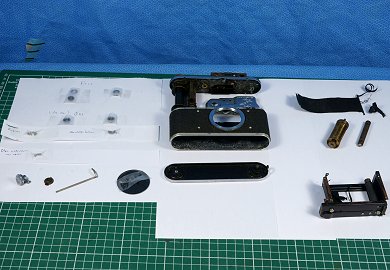 I start with the disassembly.
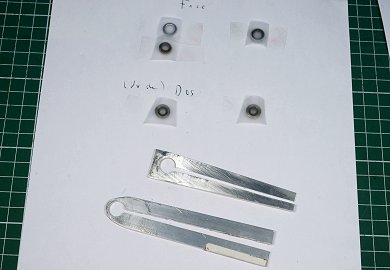 I did not have the right size of tools for the small round windows, I cut them in aluminum profile scraps from my homemade 3D printer project.
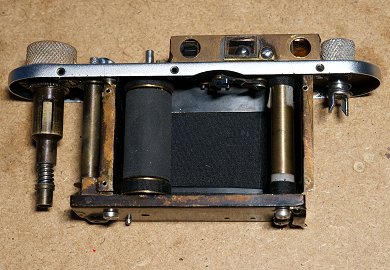
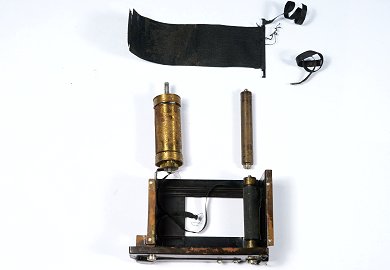 The shutter: the shell of the later models is molded, here it is in stamped, folded, and welded metal sheet. A true work of art.
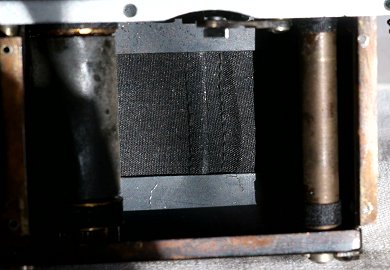
 The rubber coating of the curtains is dry, cracked, crumbles.
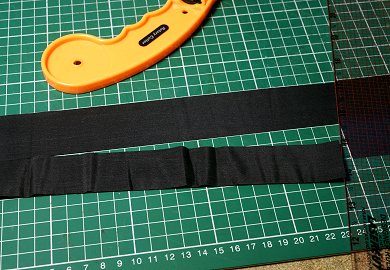 I have curtain fabric in reserve (from Ukraine, of course!).
 The challenge: making a seam that does not let light through. I do a test on an old curtain, glued with glue added with printer toner. To my surprise, it works, no light passes through the needle holes!
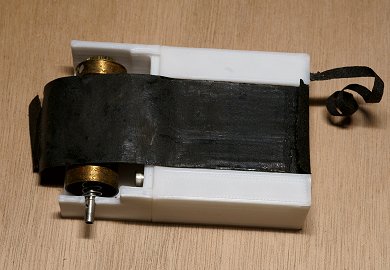 This year, I got a 3D printer. I came up with the idea of using it to make new tools. Here a first guide to stick the curtain well perpendicular to the axis.
On the right notches to guide the metal bar around which the curtain will be folded and sewn.
 And left side the collage on the drum.
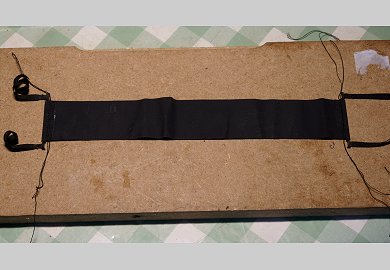 Sewing of curtains on the uprights; in several stages: first fold the curtain around to mark the fold, immobilize with clamps. The next day a first collage on the uprights, again immobilized with the clamps. And on the third day a dash of "black" glue and sewing.
And of course, after drying, control in front of the lamp!
 A new guide on the right side of my prototype tool, for sticking the curtain around the small drum.
 Curtains cut to the right length, then glued to their drums.
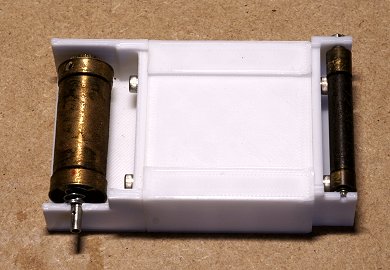
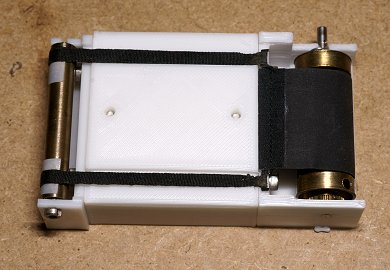 New central part in my tool, to guide the sticking of the straps, first tests with double-sided adhesive.
 The tool progresses, now a double support for the small drums, a vertical relief in the central part to guide the alignment. And still the double-sided adhesive.
 A small part inserted into the drum, to keep it's central part in the "triggered" position.
 And a small lug to block the gear. This is supposed to allow the curtains to be positioned relative to each other.
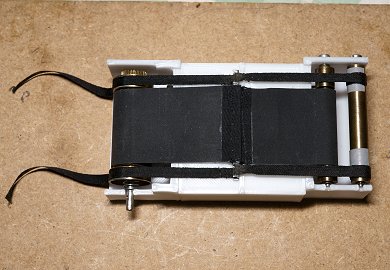
 I replace the curtains sticked with double-sided: perfect functioning.
 But after replacing with glue, something moved, there is a day of 1/2 mm between the curtains at the start of the cocking!
I will have to take off and re-stick several times to find the right position.
Finally here are the new curtains in place and perfectly functional!
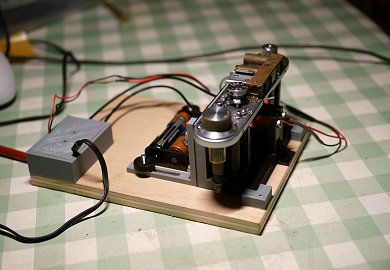 3D printing allowed me to improve my shutter tester: new support for LEDs, the original one is too wide for the FED 1, supports for the body which can only be tested when disassembled, support for optic fibers, case for the electronic card. Convenient !
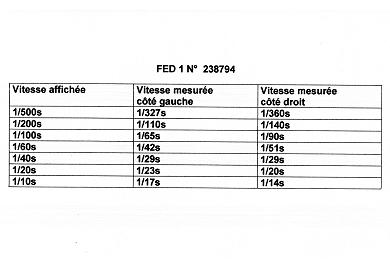 After adjustment, the shutter behavior is as expected. The speeds below 1/30s did well to disappear on the following generations, I manage to balance at 1/30s (at the position 1/40s), above the imbalance increases with speed... and the 1/500s is particularly efficient compared, for example to my Zenit 122 at factory setting: 1/280s !
 I can replace the shell, covers and buttons.
Next operation: screw the small windows back in, and adjust the range finder: setting "to infinity" and aligning the height of the "small image".
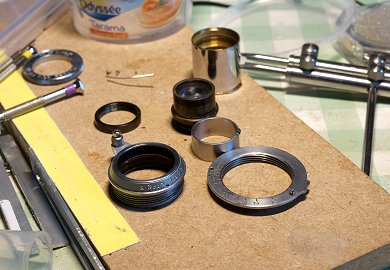 Remains to replace the old grease in the lens, whick aperture ring refuses to rotate.
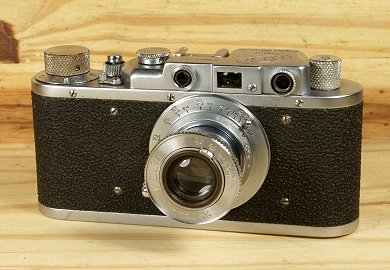 And this very beautiful FED 1 (type "F", from 1950) is ready to rejoin its owner, who intends to use it.